Saturday, August 22, 2015
Hello Savages! Today I have a quick and easy tutorial to share on how to make your leaf dies 3-dimensional.
You can use any leafy vine you like. For this tut. I use the (spoiler alert) August Die of the month, Spellbinders Romantic Vines. If your perma you should be getting your die really soon! If not, check out the boutique on reveal day, August 25th.


You can use any leafy vine you like. For this tut. I use the (spoiler alert) August Die of the month, Spellbinders Romantic Vines. If your perma you should be getting your die really soon! If not, check out the boutique on reveal day, August 25th.
Step 1:
Cut out your dies using a thick white cardstock.

Step 2:
When coloring white cardstock I always like to use a light mist to get a variegated look.

Step 3:
Mist with a green shade.

Step 4:
As you can see I used Heidi Swapp Mist and Silks Paints. I used the paint on just the tips of the leaves along with some hand tinted glitter glass.

Close up of the details

Step 5:
When the vine are partly dry use a paint brush and wrap the tips around. You can also pinch and roll.
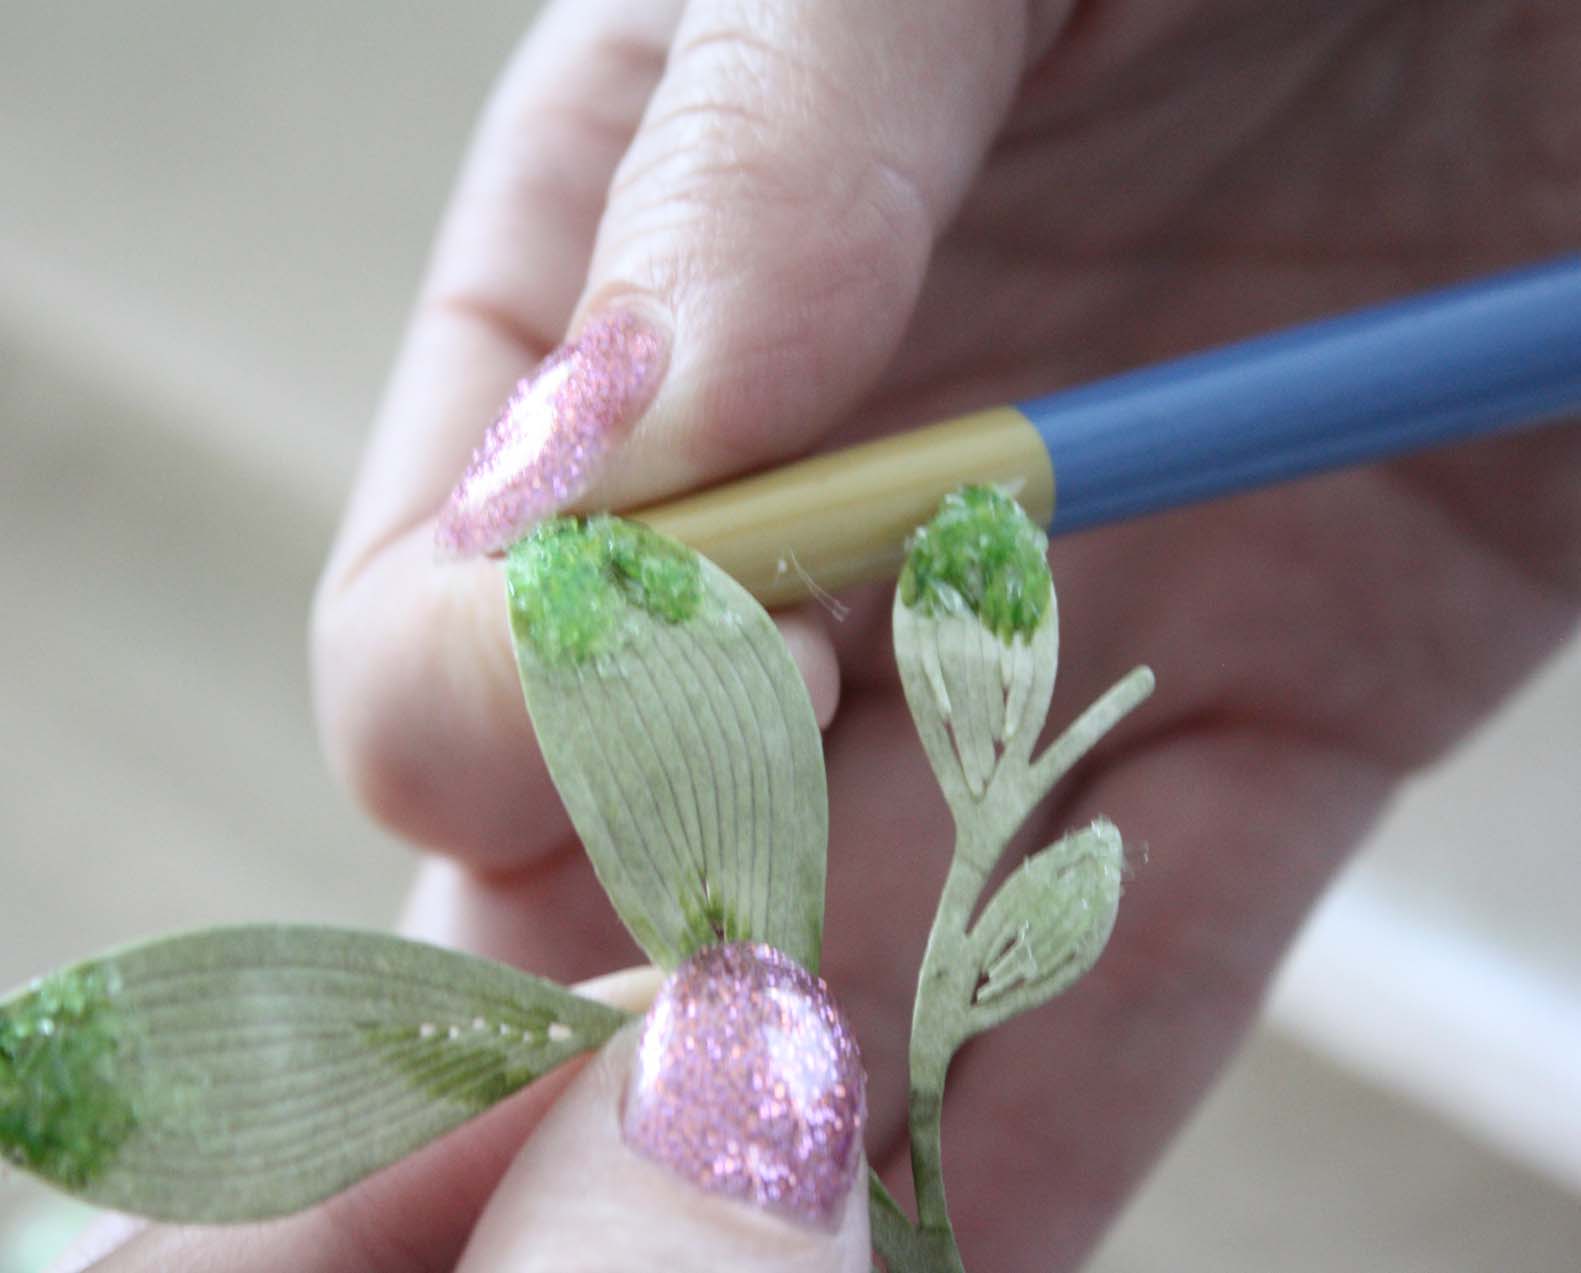
Also lift the swirls

When they are completely dry it will hold the shape.

Hope you can put this tutorial in use on your next project!
Subscribe to:
Post Comments (Atom)

Be sure to "LIKE & FOLLOW" Swirlydoos for special FB only deals and promos
Follow this blog with bloglovin

Scrapbook Sketches

see all of our sketches here
Keep Tabs On Our Blog!


Popular Posts
-
 Welcome to: Swirlydoos Kit Club February Scrapbook Kit Reveal & Blog Hop! Swirlydoos is proud to bring you our beautiful Febr...
 -
 Welcome to Swirlydoos November Kit Reveal Blog Hop BLOCK PARTY!!! That's right, we are having a party and you are all invit...
 -
 Welcome to Swirlydoos' June Kit Reveal Blog Hop Block Party!! We are so pleased to show off our June kit, Antiquities!!! This kit...
 -
 Welcome to Swirlydoos' March Kit Reveal Blog Hop Block Party!! We have some amazing projects for you to see today and as a bonus...
 -
 Welcome to Swirlydoos' Mystical Winter kit reveal Blog Hop Block Party!! Happy New Year and Welcome!!! This month's kit,...
 -
 Thank you for joining us today for our ONE DAY blog hop featuring our September kit collection, Gilted Pleasure . **All collec...
 -
 Welcome to: Swirlydoos Kit Club March Scrapbook Kit Reveal & Blog Hop! Swirlydoos is proud to bring you our beautiful March co...
 -
 SCROLL DOWN FOR THE 12 DAYS OF CHRISTMAS CONTEST: DAY FIVE! Welcome to: Swirlydoos Kit Club December Scrapbook Kit Reveal & Blo...
 -
 Boy, oh boy do we have a stellar hop for you this month!! Just when I think that Krissy couldn't possibly created a prettier ki...
 -
 Welcome to Swirlydoos December Kit Reveal Blog Hop BLOCK PARTY!!! We are having a party and you are all invited. We have some amazing projec...
5 comments:
I cannot believe the difference a bit of glitter makes!!!! Thanks, Ang, for the tip!!!
Thanks for the tutorial, Angelica! They are beautiful!
Great tip! Love it <3 TFS :)
Paula
Great idea! Thank you for sharing.
Awesome tut. I will be trying this technique soon. Thanks!!!